
A (Mostly-Finished) Little Poppins Bag
It’s almost done. I have a bit more hand sewing to do to finish attaching the base, but the rest of the bag is complete.

And before anyone asks—no, I will not take orders. I would have to charge far more for a bag than what most people are willing to pay. Any future Little Poppins bags I make will be given as gifts only.
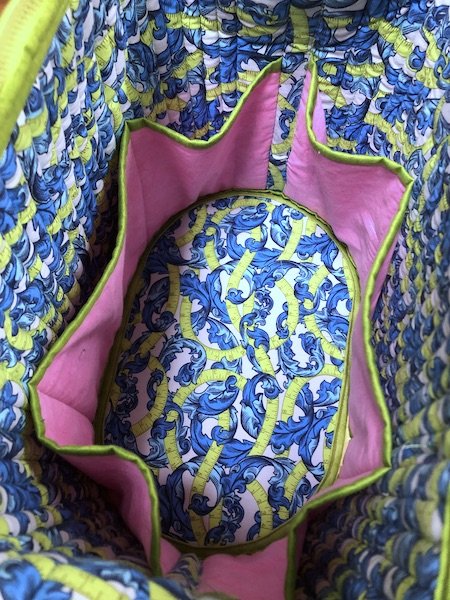
The inside pockets:
I’ve got a page of notes/changes that will be kept with the pattern. Specifically:
Rewrite the pattern in step-by-step format to make it easier to follow.
Label each photo/illustration and reference it within the text.
Reorganize the steps to make them flow more logically. (Why make the zipper pulls halfway through the bag construction when they aren’t put on until the very end?)
Note when sewists might want to change thread/bobbin thread colors.
Interface plain pieces of fabric, such as the pockets, to beef them up a bit.
Possibly add elastic to the tops of the pockets, in which case I might forego the added interfacing.
I changed the base construction, partly because I had to salvage the first base I made. I think I like my way better, however. The instructions have you make two separate bases from Craft-Tex or Peltex, fuse them to the base fabric, then cut out each base. (No template is given in the pattern for the base, although instructions are given for making your own template.) The first change I would make is to cut the bases together as one layer so they truly are identical. This is easy with a rotary cutter. The instructions then have you bind each base separately with what looks like a single layer of binding, after which you fuse the two bases together with the fabric facing out. I thought the single layer of binding was too flimsy. I ended up binding the two layers together the same way I would a quilt. I think the result looks neater. I understand that the bag may have been designed and the pattern written the way it was to account for the fact that most people will be making these bags on domestic sewing machines, but I did not think that even two layers of Peltex were difficult to sew through.
Note in the pattern that the clear plastic tubing for the handles needs to be 1/4” outside diameter tubing. The other student in the class had gone to Lowes and bought tubing, but it was 1/4” inside diameter tubing and was too big to fit inside the handles.
One of the women in the craft co-op has made several of the large Poppins bags and she says she does two at a time. I see the wisdom in that, considering how confusing the instructions are. Also, if you’re setting your machine up to do one bag, you might as well do two.
I do love the size of this bag. This one is perfect for carrying a knitting project. The large Poppins bag is big enough to carry a sewing machine, although I wouldn’t do that because it would be too easy for the base to give way, and there goes your machine. That size would make a great overnight bag, however. Most of the large Poppins bags I’ve seen feature panels rather than yardage.
******************************************************
Not much will get done this week, which is fine. My birthday is Wednesday, which is also the release date for House of Gucci. DD#2 and I made plans several months ago to go see it.
I think it’s going to be good. The husband also informed me this morning that he ordered my birthday/Christmas present. I am pretty sure I know what I am getting, LOL. It’s not a sewing machine, but something equally useful.