
From Humble Beginnings to Expensive Hobbies
I love my new Accuquilt die for cutting wool pennies. I wonder, sometimes, how they decide what shapes to put on a die. The die that I bought cuts four different sizes of circles, from 1/2” (yes, that’s tiny) to 1-1/4”. It will cut eight of each of those sizes at a time, which makes it easy to churn out lots of pennies. I would prefer the 1-1/2” size for wool pennies, but that size comes on the die that cuts 1-1/2”, 1-3/4”, 2-1/4”, and 2-1/2”, and that die only cuts two of each size at a time. I guess they are trying to economize and offer lots of options in one die, but I’d prefer one die that cuts one—or at most, two—sizes at a time and in larger quantities.
Accuquilt will make custom dies. I suppose if I owned a quilt store and I wanted to churn out lots of wool pennies to sell to customers (and I had an electric cutter), a custom die would be a worthwhile investment.
I decided to do a smallish wool penny sampler (about 15” x 15”) using natural linen for the background:

The linen is a loose enough weave that I was worried it would shift too much while I was embroidering on it, so I ironed some very sheer interfacing onto the back. It’s not so thick that it’s going to make it difficult to get a needle through it, but it’s enough to stabilize the fabric. You can’t see it, but I drew a grid on the fabric with a water-soluble marker so I could space the pennies properly before gluing them down.
Buying supplies for this kind of embroidery is very frustrating to me. First of all, most of the stores sell large pieces of wool. Large, expensive pieces of wool. I don’t want to spend $20 on half a yard of one color when I only need, at most, some small pieces for cutting pennies. Some companies do sell charm packs (five 5” squares), but the ones I have seen are all monochromatic or with color combos I don’t like. It’s possible to buy packages of wool pennies, but it’s hard to find them in only one size. Most come in packages containing multiple sizes. One company sells them in plastic zipper bags, which is lovely from a packaging standpoint but annoys me because 1) it’s more plastic to dispose of and 2) I don’t want to have to pay for the ultra-nice packaging when a plain brown paper bag would work just as well.
Then there is the thread. I was reading Sue Spargo’s book last evening and mentally totalling up the cost of the supplies she recommends—which are not cheap—and a person would have to be independently wealthy to acquire even a small fraction of what is needed to replicate her designs. The woman who taught the class at the quilt store in Spokane noted that for the sampler she made as a Christmas decoration, she spent close to $400 just on red and green pieces of wool and coordinating threads.
I’m not sure whether the issue is that suppliers don’t understand what customers are looking for or—more likely—I am an outlier who is looking for things that the market doesn’t want to supply, like diesel station wagons with manual transmissions. I would sell smaller amounts of supplies or put together kits (with well-written instructions, of course) for people who want to try these techniques but don’t want to invest hundreds of dollars.
I don’t know. I sound cheap and maybe I am, but I also hate to buy more than I need of something, especially when it’s a new activity and I don’t know how far I might take it. When it comes right down to it, though, I find it hard to justify spending that kind of money on a hobby that came about because women 150 years ago were trying to use up every scrap of fabric and thread they owned to make something useful. What a disconnect.
**************************************************
I was planning to baste the red, black, and white quilt together, but I must have miscalculated the amount of fabric I needed for the backing or else it shrank more than I thought it would. I laid the backing out, put the batting down, and put the top down, only to discover that the top came too close to the edge of the backing for my comfort. I like to have the backing be about 2” bigger than the top all the way around and it was only 1/2” in some spots.
Plan B: I pulled out one of the very first quilt tops I ever made. It has sat for five years, unquilted. I don’t know why—it’s pretty and I did a reasonably good job with it, but I never moved it to the quilting stage. It is just enough narrower than the red and black quilt to fit the backing, so I decided to baste it and finish it:
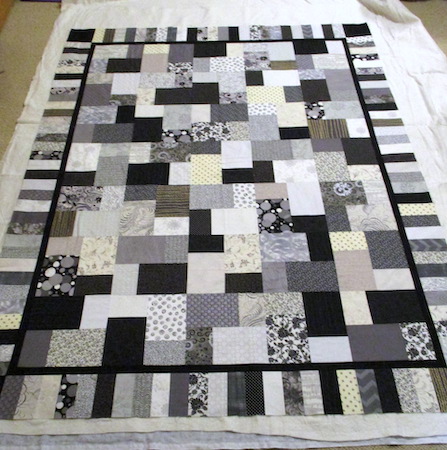
This top is going to require several kinds of quilting. I think I am going to stitch in the ditch with black thread around the edges of that narrow black border. I’ll probably quilt loops in the center portion. I have no idea what I am going to do in the piano key border (straight back and forth ditch quilting, maybe?) but that will get quilted last so I’ll have some time to think about it. (This may be why this top has never been quilted.)
**************************************************
I got the binding attached to the flying geese quilt and started sewing it down last night.

I went with purple polka dots only because I wanted something jazzier than plain Kona and because there are lots of polka-dot fabrics within the body of the quilt. Purple is not one of my favorite colors, but it was the right choice for this binding.
**************************************************
Work continues on the shop—the trusses should all be in place by the end of today. I’ll get more pictures. It was sunny and warm yesterday, which made it much more pleasant to be outside.